Life Hacks to Make Braces Easy

Braces enhance both the beauty and health of our smiles. Yet, navigating the treatment process can sometimes present challenges for patients. The good news is that with dedication and a few clever tricks, you can ensure your treatment progresses smoothly. Here are some of our favorite life hacks to simplify your braces journey.

Wax

Your orthodontist will provide you with wax to ease any irritation you might experience. But do you know the best way to apply it? Many patients struggle to get the wax to stick properly and work as intended. Here are a few steps to ensure it adheres well: Always brush and floss before applying wax to ensure a clean surface. Use a tissue or a cotton pad to dry off the area—be cautious not to snag the cotton on your brackets or wires. A dry surface is easier for the wax to stick to. Soften a small amount of wax and roll it into a ball; if it doesn’t adhere, flatten it into a pancake shape. Apply the flattened wax over the bracket and press firmly on the edges to secure it in place. If you find wax application challenging, consider using a product like Ortho Dots, designed for easier application.

Soothing Irritation

While wax is effective for soothing irritation, there are alternatives if it doesn’t suit you. Over-the-counter (OTC) medications such as ibuprofen or acetaminophen can be highly effective, not only for irritation but for managing soreness. It’s crucial to use these medications strictly as directed, considering daily limits and potential interactions with other medications. Topical oral anesthetic can also numb affected areas. Always consult your orthodontist before using any OTC medications.

Easiest Way to Floss

Using regular floss can be frustrating when you have braces, but you must floss during treatment. Ortho Picks are one of our favorite products for flossing. This product is designed specifically for flossing with braces. One of the sides can fit under your wires, which is a struggle when using regular floss. We love this product and believe it makes flossing super easy. Work smarter, not harder, right?

Avoiding Stains

Some foods and drinks can cause staining, leaving a noticeable ring around the bracket when your braces are removed. Certain colors of braces can also temporarily stain which many patients find unappealing. Lighter colors like white and yellow are particularly prone to staining. To prevent long-term staining, it’s important to understand what causes staining and how to minimize it. Foods and drinks high in acidity, dark-colored foods, and items with artificial dyes all contribute to staining, a concern that persists even without braces.

Acidic: Coffee, tea, wine, soda, kinds of vinegar, berries, sauces, etc.

Dark: Darker chocolates, bright fruits/vegetables like beets, soy sauce, balsamic vinegar, curry, etc.

Dyed: Candy (think candies that leave a color on your tongue), food coloring, etc.

Okay, that’s a long list, but don’t worry. You don’t have to cut out these foods completely! Drink through a straw to keep liquid from touching your teeth and try not to let it linger in your mouth. Rinse your mouth out after eating/drinking, and then brush after. Be careful not to brush until at least 30 minutes after eating acidic foods because it can damage your enamel. You can also mix ingredients like fruit and tea with milk to lessen the staining effects. Finally, drink a lot of water throughout the day because it can help rinse your teeth. There are plenty of ways to keep staining at bay!

Bottomline

These life hacks use alternatives and tools to work with the braces instead of against them. Make sure you use trusted sources when looking for help with your treatment, and don’t be afraid to call up your orthodontist for any questions. Our team is always ready to help and answer questions. Good luck on your braces journey!
How to Clean Braces

It’s no secret that it can be difficult to brush and floss with braces… But it’s important to keep them clean! Luckily, there have been many advancements over the years that have made the process much easier. Read on for a detailed guide on how to brush and floss your braces!

Tools for Brushing

Toothbrushes

You’ll want to get a toothbrush that is firm, but not so firm that it scratches your gums or enamel. Medium or hard-bristled toothbrushes are usually too firm for your teeth and gums. There are special toothbrushes made for braces and electric toothbrushes you can use to make the process easier and faster, but they’re not mandatory. If you can spend extra money, special toothbrushes could be for you. You can always check with your dentist or orthodontist to ensure you make the right choice.

Toothpaste

Always use toothpaste with fluoride. Fluoride is a natural mineral that reverses early tooth decay. It also helps keep bacteria from sticking to your teeth! A good rule of thumb for picking a toothpaste is to look for an American Dental Association (ADA) seal on the package. Your dentist or orthodontist will happily point you in the right direction as well.

Brushing

Hold your toothbrush at a 45-degree angle.

Use gentle, wide strokes back and forth. Use this method to thoroughly brush each tooth along the gumline.

Next, brush the surface of your braces. That is the part that shows when you open your mouth or smile.

Finish by brushing the inner surfaces of your teeth, including the parts where you chew food. Don’t forget to brush your tongue as well.

If you feel you need more of a deep clean, you can use a proxy brush with a small amount of toothpaste. The thin brush can get in the tight areas between your teeth, where cavities often develop with braces. Remember, this product is used to supplement brushing and flossing. You cannot use it as a substitution. It’s not a standalone solution, but it’s a great addition.

Tools for Flossing

Standard Floss

Your usual string floss is perfectly fine to use.

Floss Threader

This small tool helps you to get the floss under your braces for an easier experience.

OrthoPick (optional)

These tools are much like the small, plastic, disposable flossers you see at the store. However, they are designed specifically for use with braces.

Water Flosser (optional)

The water flosser uses pressure to get the gunk between your teeth.

Flossing with Standard Floss

Take the threader’s thin end and run it underneath your wire, leaving some room for the loop. Grab your regular floss and thread it through the loop. Once the end of the floss is over enough, grab the threader and pull until you can grab the regular floss underneath the wire. You are done with the threader now.

Wrap the ends of the floss around your pointer fingers of both hands but leave a few inches of taut floss between them. Gently slide the floss between each set of teeth using a back-and-forth. Repeat this process for every single tooth.

Flossing with an Orthopick

Guide the smaller side underneath your wire, and floss as normal. That’s it! You can view a demonstration here. This option is easy and quick. It takes all the hassle out of flossing.

Flossing with a Water Flosser

Use the flosser to spray water on your teeth and braces. Make sure to get your gumline, braces surface, and in between teeth. This tool is also a great alternative to regular floss.

How Often do I Brush and Floss?

You should brush and floss after every meal. Food can get stuck much easier with braces on. Cleaning after every meal will help keep the food from getting trapped within your braces. If the food stays trapped, it can create cavities and even discolor the parts of the teeth not covered by the brackets. So, stay diligent with your oral hygiene. Once you find the brushing and flossing combination that works best for you, it won’t feel like such a chore anymore!

5 Foods You Can Still Eat with Braces

It’s no secret that braces come with diet restrictions to keep from breaking them. Crunchy, sticky, chewy, and hard textures can break brackets or wires. You can’t chew on things like taffy and caramels while in braces, BUT you can still enjoy plenty of food! Keep reading to see our top picks for foods you can eat in braces. Just don’t forget to brush and floss after!

Ice Cream

Yes, that’s right! Ice cream is creamy and soft, which is perfect for braces. This also includes frozen yogurt and smoothies. Sometimes, you might feel sore and a cold treat like ice cream can help soothe your mouth.

There is a caveat when it comes to toppings. Be careful not to have any hard, sticky add-ons like crushed Heath bars or peanuts. You can have soft fruits, sauces, and whipped cream, though!

Pasta

Who doesn’t love pasta? You can have pretty much any pasta as long as you cook your noodles to be softer. Alfredo, marinara, spicy…. we could go on and on! You can also throw in vegetables and meat if they are soft enough. That’s a proper meal!

Ramen/Soup

College kids know about this one! Ramen –and really any soup– is braces-friendly. Typically, any noodle or topping in soup is soft and tender enough to eat. You can even put a soft-boiled egg in there! Take caution with toppings like seaweed because it can get stuck in your braces. All this ramen talk reminds us of the next food on our list.

Seafood

It’s nice and tender, so it’s unlikely to damage your appliances. Cut it into smaller bites if you want to be extra cautious. Soft seafood like tuna, salmon, cod, and shrimp are safe to eat. Avoid bones and shells, of course. So, if you’re going to have something like crab or mussels, make sure you are eating the soft parts ONLY.

Cakes & Muffins

Moist, soft bakery is great! You can enjoy a slice of cake occasionally, just like everyone else. You can even have pancakes! Be careful not to eat anything with hard toppings or mix-ins like nuts.

The Bottomline

There are still so many foods you can eat. Sometimes it’s just a matter of cooking an ingredient so it’s softer, or not putting in a certain topping. We’ve said this before, and we will say it again: Nothing chewy, sticky, crunchy, or hard.  If you adhere to this, you’ll be fine! If you’re ever unsure about whether you can eat a food or not, you can always call your orthodontist’s office. We are always willing to help, and we’d rather you ask if it’s unclear. Also, don’t forget to floss and brush after meals! This is especially important after something sugary like ice cream or cake.

Braces: Do They Hurt?

Braces have a bit of a reputation for being uncomfortable, but understanding what to expect can ease concerns if you’re considering orthodontic treatment. The idea of pain might deter you from seeking treatment, but we promise it’s not as daunting as it seems. Let’s delve into whether braces are as painful as they’re often portrayed.

Getting Braces: Is It Painful?

In short, no it shouldn’t be painful! The process of attaching braces is relatively easy for the patient. Brackets will be joined to each tooth with a special adhesive and then cured with light, essentially gluing the brackets to your teeth.  A thin wire will run through the indents in your brackets and trimmed to fit your mouth. Finally, you get to choose colorful bands to hold the wire in place. Nothing should feel painful during this process, and your orthodontist will frequently check in to ensure your comfort.

Initial Discomfort After Getting Braces

You may experience some discomfort after the braces are first applied as your mouth adjusts to the change. The pressure from the braces encourages your teeth to move, which can lead to soreness. Pain varies from person to person, but most people report feeling sore for the first few days. Think about how you feel after physical activities like lifting weights or jogging. That’s how your mouth might feel, but it’s manageable. There are ways to soothe that sore feeling, just like there are ways to soothe sore muscles. Some of the most effective ways include mild pain relievers and saltwater rinses.

Will Braces Hurt as Treatment Goes On?

The pressure and tension will lessen as your teeth gradually shift into position. Each adjustment appointment increases this tension. After these adjustments, you might experience some discomfort, but it should be brief and manageable with the same remedies.

Other Sources of Discomfort

Occasionally, you might feel irritation from wires poking you or brackets rubbing against the inside of your cheeks. If this happens, you can use braces wax to cover the problem area. You only need to roll up a small ball and place it on the area causing you irritation.

So, Are Braces Really Painful?

While you might experience minor irritation, braces are not typically painful. Everyone’s pain tolerance varies, but it shouldn’t be unbearable by any means. If something feels off, don’t hesitate to contact your orthodontist for advice or an appointment. Their goal is to make your experience as comfortable as possible. If you listen to your body and communicate any concerns, you’ll do your part in making your braces journey as smooth and easy as possible!

Clear Aligners like Invisalign | The Pros and Cons

A picture of a clear aligner tray with the words "Pros & Cons of Clear Aligners"

There are several different options you and your orthodontist can choose from when considering treatment to straighten your teeth. One of the most popular options right now is clear aligners. Clear aligners are plastic copies of your teeth that use slight pressure to reposition them. Orthodontists use impressions or digital scans to map out the plan they have for your teeth. The aligners are worn for 1-2 weeks, then switched to another set to slowly move the teeth.

Pros
Appearance

Clear Aligners are virtually invisible, so your smile won’t look very different on a day-to-day basis. You won’t have metal brackets and wires in your mouth. This is likely one of the most popular reasons why Clear Aligners have gained notoriety in recent years.

Convenience

You can remove your aligners just like you can remove a retainer. It can be difficult to floss and brush effectively with metal braces, but you can take your Clear Aligners out during these activities.

No Diet Restrictions

You don’t have to avoid certain foods as you would with traditional braces. There is no risk of breaking a wire when chewing gum or extra sticky foods. Candy lovers rejoice! We do want to note that Clear Aligners must be out of the mouth while eating and drinking. It’s also good practice to brush before putting them back in.

Comfort

Aligners don’t have wires or brackets, so they won’t irritate your mouth. Anything that pushes your teeth will cause some discomfort, but they are significantly more comfortable to wear than traditional braces.

Cons
Eligibility

Aligners don’t work with more severe cases that need more than moderate corrections. Unfortunately, traditional braces can only reliably treat complex cases at this time. One size doesn’t fit all for Clear Aligners. Ultimately, your orthodontist will be able to determine whether Aligners are right for you. If your bite or teeth need significant correction, they will likely choose traditional braces.

Compliance

While it’s much more convenient to be able to physically remove your appliance for things like brushing and eating, Clear Aligners still need to be in your mouth often to work. It is typically recommended that Aligners stay in your mouth for at least 22 hours a day. That means they can only be out for a total of 2 hours a day at the most. When your teeth start to move, it can be uncomfortable. You might be more inclined to take your Aligners out when this discomfort starts, but you must keep them in, or they won’t work as effectively.

Cost

Clear Aligners like Invisalign are usually around $3,500 to $8,000. Some dental insurances are starting to cover Clear Aligners, but it’s not as common as traditional braces. So, you may be paying out-of-pocket for the entire treatment. That’s a pretty penny compared to other options.

Conclusion

Whether you get clear aligners or another treatment choice, the goal is still the same: achieving a straighter, healthier smile. Discuss your options thoroughly with your orthodontist to make an informed decision that aligns with your dental needs, lifestyle, and budget. By understanding their benefits and limitations, you can embark on your journey toward a straighter smile confidently.

You can learn more information about our Invisalign treatment here.

Retainers: Why They’re So Important + 3 Most Common Types

A 4 photo collage. From left to right, bottom to top: A pink Hawley (wire) retainer, a picture of a woman putting a clear retainer on her teeth, a clear retainer, a blue bottom and top retainer set with a green case

Once you finish orthodontic treatment, your orthodontic team will make a retainer for you. This part of your treatment is called retention. Retainers are a crucial part of treatment but are often regarded with much less importance by patients. Let’s talk about retainers, why they are important, and more!

What Retainers Do

Your braces or aligners move your teeth into the correct position. Unfortunately, our teeth are stubborn and try to move around even after braces shift them. This is why we use retainers. The word retain means to keep something in place. So, your retainer holds your teeth in place. Your doctor customizes the retainer to the exact position your teeth were moved to so they don’t shift.

It’s like getting your ears pierced. The needle creates the hole, but the earring holds it open. The hole will close if you take your jewelry out for too long. The process is similar. The braces create your straight smile, but the retainer holds the smile in place. Your teeth will move if you do not wear your retainer as your doctor prescribes.

Types of Retainers

Retainers can be permanent or removable. The three most common types of retainers are fixed/permanent, wire, and clear retainers.

Fixed Retainer:

These retainers are bonded (or glued) to the inside of your teeth. You cannot take them off yourself, an orthodontist would have to do it. Fixed retainers are typically placed on the front teeth (upper or lower) because they like to shift the most. You don’t have to worry about how long you’re wearing the retainer, when to put it back in, or about your front teeth shifting since it’s bonded on! Plus, you won’t see the retainer since it’s bonded to the backside of your teeth. However, you will have to worry about cleaning your teeth correctly and avoiding hard foods, much like braces.

Removable Retainer:

These retainers are not bonded to your teeth so you can take them out when needed. Removable retainers are custom fit to all your teeth, so none of them will move after treatment. It’s much easier to take care of your teeth with these retainers since you can take them out while brushing and flossing. The removable feature is nice, but you must be extremely diligent. You might be tempted to keep them out or forget to wear them, but you need to wear them to keep your teeth straight. You can also mistakenly throw them away if you aren’t careful, so keep them in their case when not in use. The best way to stay consistent with retainer use is to make them part of your routine.

There are more cosmetic options when it comes to removable retainers. Hawley Retainers are considered the “traditional” version of retainers. The wire goes around your front teeth and is attached to a piece of plastic that fits the inside of your teeth. You can customize the color of the plastic part of the retainer! The wire is visible when you talk or smile.

Clear Retainers are removable and made of plastic just like wire retainers. However, they are not visible when you talk or smile!

How long do I wear a retainer?

Your doctor will tell you when and how long to wear your retainer. The exact timing depends on your individualized treatment. Some orthodontists will have you wear your retainer day and night for 6 months and then every night after that. Others might tell you to wear your retainer only at night for the first 6 months, and then every other night after that. Regardless, you will need to follow the instructions prescribed for the rest of your life.

Remember how we said your teeth will move if you don’t wear your retainer? That never changes. It sounds crazy to hear that you must wear them that long, but you spent a lot of time and money to get them straight. Wouldn’t you be mad if they ended up shifting again? Plus, we promise it’s not hard to stay consistent! Putting in your retainer will become just another step in your bedtime routine.

The Bottomline

Retainers are a vital part of orthodontic treatment, and they aren’t that much of a hassle. You’ll need to wear your retainer consistently and keep it clean…but that’s it. Straight teeth for the rest of your life are worth an extra step at bedtime!

Read more about orthodontics here. Schedule a consultation with us!

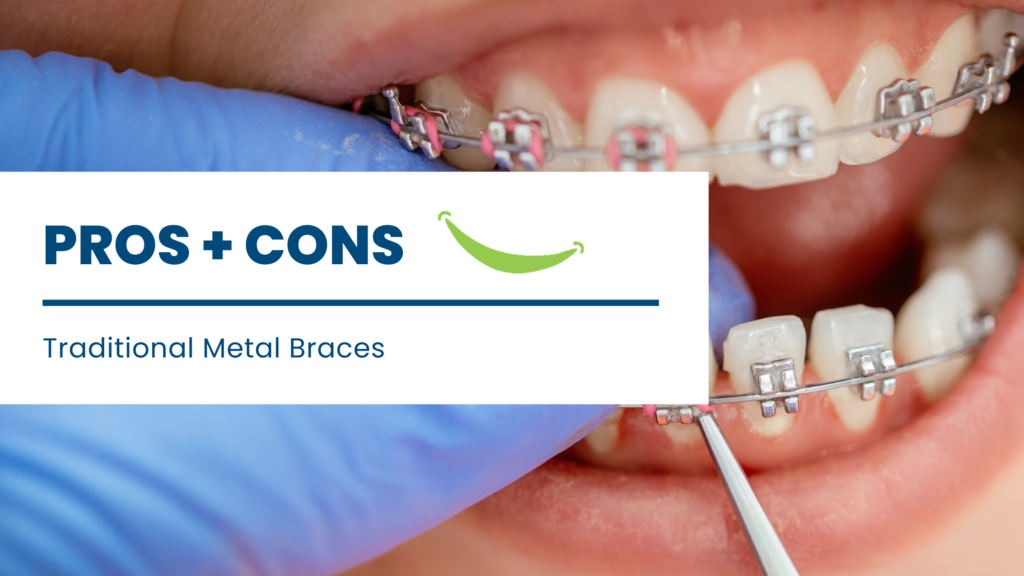
The Pros and Cons of Braces

You and your orthodontist can choose from several different options when considering treatment to straighten your teeth. One of the most common options is traditional braces.

Often called metal braces, traditional braces are likely the first image that pops into your head when you think about braces and orthodontics because they have been around the longest. They are the tried-and-true method for correcting dental issues and straightening teeth. Metal braces consist of metal brackets cemented, or bonded, to each tooth. A thin wire attaches to the brackets to gently guide your teeth into a certain position. In recent years they’ve become even smaller as technology has advanced! Like any option, there are pros and cons of braces.

Pros

What makes them so popular?

Efficient. Braces allow for greater control over where the teeth are moving, as each bracket is attached to your teeth. Studies have shown that Metal Braces are more effective in treatment and long-term success than clear aligners.

Strong. Metal Braces are made from, well, metal! This means they are much more durable than other options. You are less likely to accidentally break any appliances and need to replace them.

Customizable. There is a huge variety of colors you can put onto your braces. You can change the colors for themes, aesthetics, holidays, or anything else you desire. Braces are used as an accessory this way, making them more fun!

Affordable. Metal Braces are the most affordable treatment option for correcting teeth. While not all dental insurance plans cover braces, the typical coverage is up to 50% of the total cost. Also, yes, braces are cheaper than Invisalign.

Cons

What are some drawbacks people dislike?

Time. Metal Braces are typically on for around 1-2 years at our office. That’s longer than other options, like clear aligners.

Diet Restrictions. You must take good care of your Braces and be careful about what kinds of food you eat since they are essentially glued to your teeth. Plaque can build up around the brackets, creating a ring of staining and sometimes even permanent damage to your teeth.     

Comfortability. While technological advancements have helped, Metal Braces can still be uncomfortable at times. Your gums and mouth can feel irritated, and you may have to use dental wax to relieve your discomfort.

Are Traditional Braces Right For You?

Metal Braces are a common choice for a reason, so they could be right for you! Remember: Orthodontic care is specialized and individualized to your mouth. Consulting with an orthodontist is the best way to figure out the perfect plan. Your orthodontist will be able to give you an official diagnosis, specified treatment options, and more information to help you make your decision. There might be different pros and cons of braces for your specific treatment. If you are considering braces, you should schedule a free consultation today!

Read more posts from us here.